• youtube
  • linkedin
  • twitter
  • Facebook
  • Help
  • News
  • Home
  • Home
  • Our Products
    • An Overview
    • TimeTabler
    • Options
    • StaffCover
    • The Timetabler’s
      CookBook
    • The TOOLS
      online System
    • FAQs
    • Links to MIS
    • Help & Support
  • Our Schools
    • Comments
      & Testimonials
    • TimeTabler around
      the World
    • Existing customer ?
      Upgrades & Renewals
    • TimeTabler for MATs
  • How to order
    • Tutorial Versions
      (try before you buy)
    • Book an Online Demo
    • FAQs
    • Users’ Comments
    • New customer ?
      Order Now
    • Existing customer ?
      Upgrades & Renewals
    • How to Pay
  • Help & Support
    • Help in 12 ways
    • New To Timetabling?
      Skills, principles, etc
    • Moving from Nova-T6
    • Free Timetabling Booklets
    • Support Centre
    • Training & Courses
      On-site, workshops,
      webinars, etc
    • Help Movies
    • Exporting to your MIS
    • Upgrades & Renewals
  • Downloads
    • Free Downloads
    • TimeTabler Tutorial
    • Options Tutorial
    • StaffCover Tutorial
    • Free Timetabling Booklets
    • Principles & materials
    • Physics teaching
    • Readability tests
    • Lesson Loader
  • Contact Us

The TOOLS System

Class of Smiling Students
  • TimeTabler
    • More Details
    • 4 Key Reasons
    • FAQs
    • Features and Screenshots
    • TimeTabler for MATs
    • Moving from Nova-T6
  • More Software
    • Options (Electives)
    • The TOOLS System
    • StaffCover
  • Help & Support
    • New To Timetabling?
    • Gold-Start
    • Timetabling Book
    • Training & Support
    • Vouchers
  • Free Trial
  • Buy Now

Testimonials

I can now create a better timetable in less time.Philip MoonHigh School of Glasgow, Scotland
Brilliant, easy to use, wonderfully supported by a highly knowledgeable team.Keith IrvineBishops’ Stortford College Herts
TimeTabler and Options have been fantastic tools.

John Ridley
Tanglin Trust,
Singapore
With TimeTabler, 3 days’ work can be carried out in minutes.Ian CrabbeMarlborough College, Wilts
I have been really impressed with the support that I have received.Anne HoldenPortland Central,Australia
I found TimeTabler much easier to use …Beth LedgerAmman Valley School,Wales
TimeTabler has continued to be great value for money.Danny KotelHenry Lawson High School,Australia
We thoroughly recommend all three products … they save us a great deal of time.Ted Fenton, David WilliamsCokethorpe School, Oxon
I can recommend TimeTabler and Options to anyone.John MackenzieDunalastair School,Chile
I thoroughly recommend TimeTabler to any school.Charles BrenanNewland House School,Middlesex

Home / The TOOLS System

TOOLS: the online system             Tools-OPT2012-toolsSingleButton

Allow your students (or parents) to make their options choices from home / over the internet.  You can download TOOLS by clicking the link at the bottom of this page.

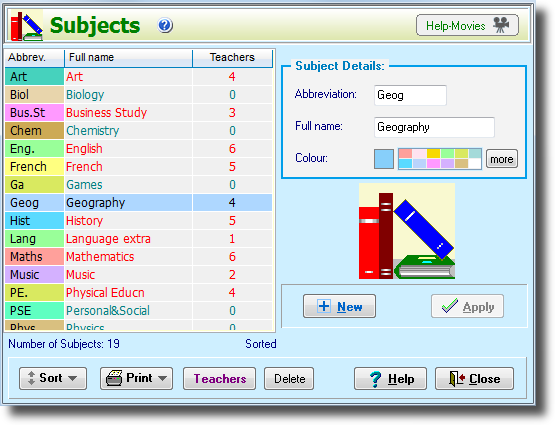
In the Options program there are 3 ways of entering the subject Choices that your students make.

1. While importing the Students’ Names from your MIS or from an Excel spreadsheet, you can also import their Choices, if these are known at that stage.

Or:

Use TOOLS from a laptop, phone, IPad, etc.
2. You can enter the students’ Choices manually on-screen.
The quickest way is to click on the grid [see page 21 in the Options Handbook].Or:
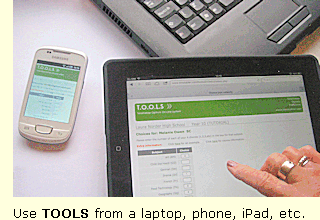
3. Or you can let the Parents/Students enter their Choices on-line, via the internet, from home.
This is done using the TOOLS system (‘TimeTabler Options On-Line System’).  They can use their laptop, tablet, smart phone, iPhone, iPad, etc.new  And it saves you from having to deal with lots of paper.


To go to the main page about the Options software, click here for more details.


TOOLS is a system to allow parents/students to select their optional subject Choices on-line, using the internet instead of the traditional paper method (which you can still use if you prefer it).
Apart from looking more modern, this method means that you don’t have to type the students’ Choices into Options …the parents/students do it for you !

If you choose to use this system, you may need the assistance of your IT Manager to install the necessary files on your school’s Web-Server.  We provide the files and full documentation on this.
Alternatively we can arrange for TOOLS to be hosted for you, more details here.
Special Offer : for the current period one year’s Free Hosting (by MIST Services) is provided with each new purchase of Options .

There are 3 stages to the TOOLS system:

Stage 1
After you have entered or imported your Students’ Names from your MIS or a spreadsheet, a screen in Options allows you to print a letter to each Student/Parent which includes:
• a URL web-address  eg. www.myschool.sch.uk/options
• an individual Username and Password/PIN.

Stage 2
At home, the Student/Parent enters this URL on their computer or phone or iPad to see a Log-in Screen.
They enter their UserName and Password/PIN to see screens like these 2 examples:

Example 1

Example 2

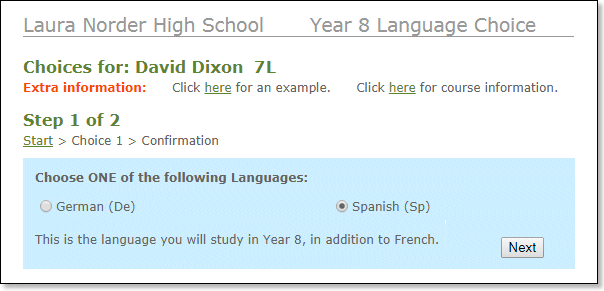
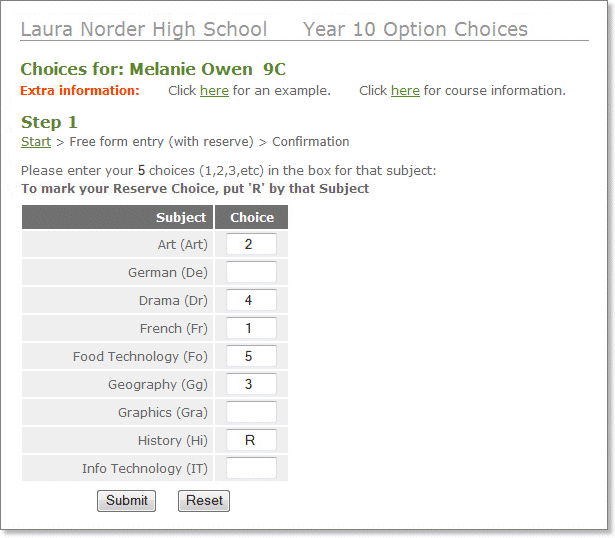
The Student/Parent (or the school Guidance Counsellor) enters their Choices and clicks on the ‘Submit’ button.
The system stores the result, and sends them an email confirming the Choices they have requested.

Stage 3
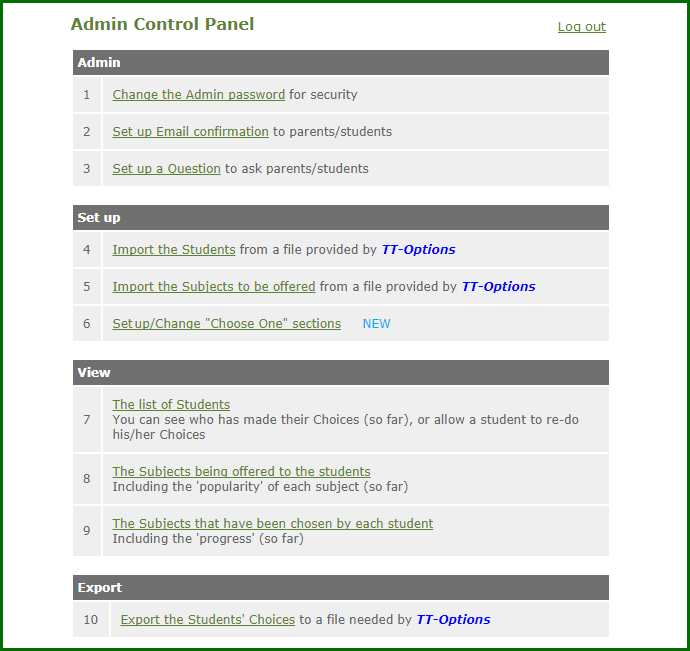
You can see [on your Control Panel, see below] when all the Students/Parents have entered their Choices.
Then you can transfer the Choices to the Options program and proceed in the usual way.

As usual Options will produce a mail-merged letter to Parents to tell them of the final subject choices.


The TOOLS Control Panel

As administrator you have access to the Control Panel (from anywhere with web access):

TOOLS-ControlPanel

To learn more about the Options program, click here for more details.
When you first start Options you see two buttons:  Tools-OPT2012-toolsButtons

Clicking on the second gives you a screen:

Tools-OPT2012-SetUpTools

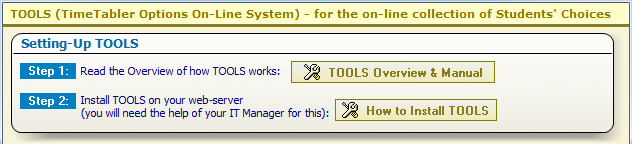
Click on these buttons to get full documentation, so you can decide if you want to use this new system.
Special Offer : one year’s Free Hosting (by MIST Services) is provided with each purchase of Options.

Or of course you can use your existing paper system, just as before.

If you have any queries, please e-mail them to: support@timetabler.com
We will answer any questions you may have about using the software in your particular school.


Downloading TOOLS

You can download and install TOOLS for free by filling out the Form here.  You must register with a valid school email address.
** Note: TOOLS
works alongsideOptions, so before completing this form please ensure that you have a valid licence for Options or have ordered this year’s upgrade; if you are not sure or have any questions, please email orders@timetabler.com and we will be pleased to help you.


Click here to Tell a Friend or Colleague about this page.

Home / The TOOLS System

The TimeTabler Newsletter

Our free Monthly Newsletter for School Timetablers:  Click here for more info, or to sign-up.

Logo

October Resolutions

  • About Us
  • Contact Us
  • Careers at TimeTabler
  • Data & Privacy
  • – – – – – – – – – – –
  • Help & Support
  • Associates & Training

Our Software

  • TimeTabler
  • Options / Electives
  • StaffCover
  • – – – – – – – – – –
  • Free Tutorials
  • Add to Wish-List
  • How to Buy

Extras & Services

  • Timetabler’s CookBook
  • TOOLS (for Options)
  • Training & Courses
  • – – – – – – – – – –
  • Free Resources
  • New To Timetabling ?
  • Gold-Start Support

Stay in contact

  • Contact Us
  • Read our Blog/News
  • ----------
  • Social Media
  • ----------
  • Tell a Friend
  • Our NewsLetter

© 1979-2023 October Resolutions Ltd

  • Terms & Conditions
Basic Data

BasicData-thumbnail

This shows the Main Menu, and Step 1 : the Basic Data screen, with five big buttons.

Each button leads you to an entry screen.

To enter your data you would start at the left, and work your way across to the right.

Look how straightforward it is, compared to other programs !

And the fully-illustrated printed Manual explains each step, in detail.


Subjects Screen

subjects screen

This is the screen for saying which Subjects you will want to timetable.

You can return here at any time to edit / alter your data.

You can give each Subject a colour – this helps during scheduling, and for the printouts.

Visual Builder Screen

visual builder screen

This is the main screen on which you do the actual scheduling.
You can sit at this Visual Builder Screen and drag-and-drop to ‘drive’ through the timetable.
 
At first sight it looks very complicated.  To see what each part will do for you, please click on: www.timetabler.com/kb/UsingtheVisualBuilderScreen.pdf

Class Timetable Screen


visual builder screen


This shows you the Class Timetables, so you can see the pattern while you are scheduling lessons.
  
There are similar screens for the Staff Timetables and for the Room Timetables.
 
If you use dual monitors you can see these more easily and spread them out over the bigger area.

All the buttons, and the symbols, are explained when you click on the button.

The Printout Menu

This shows you some of the possibilities for the Printouts.
 
Within each of these, there are millions of ways of fine-tuning the exact design of the Printouts.

They can be printed on paper, or produced as web-pages, at the click of a button.

A professional result.
 

The 'master' Class Printout Screen

Class timetable printout screen

This shows you the Preview Screen , so you can design the ‘master’ Class printout, before printing it.
 
There are similar screens for the Staff Timetables and for the Room Timetables.
 
You have total control over the design, the font and the colour, the column widths, the labels, etc, etc.
 
All the buttons and the controls, are explained when you click on the button.