Export to PHOENIX Gold
Part 2
You will need to have TimeTabler 2001 (v4.10.15) or later.
TimeTabler 2002 or later is better, with some improved features, see below.
There is separate documentation for Phoenix e1.
First ensure that you have already carried out steps 1 to 5 on the Preparing to Export page.
It is always advisable to do a full backup, for safety, via File ->TT-Backup before doing any of the steps below.
Ensure you consult your Phoenix Gold manual and any LEA guidelines that are available.
For section 2 you will find it useful to have to hand:
a) a printout from Phoenix of the Phoenix class names.
b) printouts of the Class timetables from TimeTabler, see section J15 or J18 in the Handbook, (perhaps with a Printout Design of Line 1: s t r ).
You can also use these to check that each lesson has got a subject and a room.
There are 3 more steps to complete the Export to Phoenix Gold :
1. Export a list of teaching groups from Phoenix
You need to be using Phoenix version 1.11 (with the May 2001 patch installed), or a later version.
a) Run Phoenix and on the main menu choose ‘Timetable‘ on the left-hand side, and then ‘Timetable set-up‘ on the right-hand side.
b) From the list which appears, choose TimeTabler (so the name TimeTabler appears in red below), and then click on the button labelled Export data. (NB. Make sure you choose Export, not import at this stage.)
c) You are shown a ‘Browse’ screen so that you can decide where you want to store the exported data.
This will save a file to disc, of the curriculum labelling used in Phoenix, which you need to do the matching in section 2, below. If you are running Phoenix and TimeTabler on different machines save this file to a floppy disc.
Select where you want to save the file (eg. A: for floppy) and remember where it is.
The name of the file of data you are storing is PX-TT.CSV (or Px-tt.csv)
2. In TimeTabler, match the Phoenix curriculum to the finished TimeTabler schedule
In TimeTabler, go to the File Menu and select:
File -> Export to … -> Phoenix -> Export
(Note that the option here to ‘View Log’ allows you to see any error messages that occurred in a previous Matching Session, see below.)
and then click on the Start button. On the screen which appears, there are 3 steps to take:
Step
1. Click on the button to view the list of your schedules. Click on the correct schedule. ie. the one that you have edited as described in steps 1 to 5 on the Preparing to Export page.
Then click on Select.
Step 2.
Choose whether you are going to use the Teacher codes shown in
— the Initials column, or
— the Full Name column
of the Teachers Screen (section C5), see step 2 on the Preparing to Export page.
Choose whether
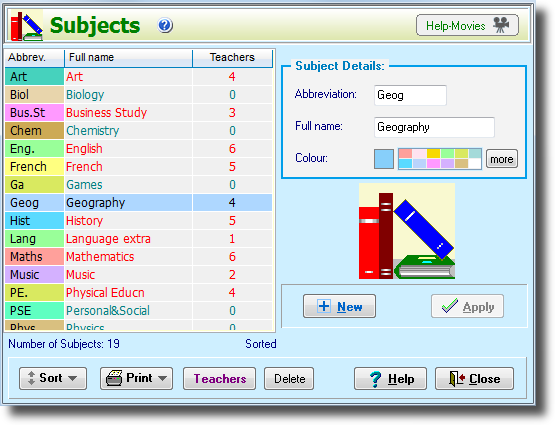
you are going to use the Subject codes shown in
— the Abbreviations column, or
— the Full Name column
of the Subjects Screen (section C3), see step 4 on the Preparing to Export page.
Note 1:
In earlier versions of TimeTabler only the Full Name column can be used.
Note 2: The export can only work if the lessons in TimeTabler have the correct Subject code. For example, if a teacher’s main Subject is Maths, but for a particular lesson they are teaching PE, then the Subject for this lesson must be PE or else it cannot be matched and exported. See Section F13 (and D7) in the Manual for how to change the Subject for a lesson.
Step 3.
Click on the browse button and then steer in the usual way to the folder (or the floppy-disc) where you stored the file in section 1 above.
Click on the file, named PX-TT.CSV (or Px-tt.csv), and then click the Open button to load in the file.
Then click on Next Step.
This takes you to the Class-Linking Screen:
The Class-Linking Screen:
Note:
At this stage and from now on, you can choose to save your work, exit the program and re-start at the same place later.
(On re-starting you are also given the option of beginning again, for example if you have changed staff initials/rooms/class details since the previous session.)
On this screen you link the top Phoenix class on the left-hand side ( 3MA.Y1 in the example shown) with the correct TimeTabler class on the right-hand side.
With a little practice you will probably be able to do each Year-group in 5-10 minutes.
The box on the right-hand side displays all the TimeTabler classes that could link with the highlighted Phoenix class.
Often the Phoenix class will link with the top class on the right-hand side, but you can use your mouse or the <up/down> arrow keys to choose which TimeTabler class you want.
In the example MA 3Y AMa Mon 3 means Maths for TimeTabler class 3Y with teacher AMa and the first time it appears on the timetable is Monday period 3 (so that you can identify it if there is any ambiguity).
The final numbers (1, 2, 3…) group the members of a teacher-team, in team-order, as specified in TimeTabler.
When you have highlighted the correct class, just click on the Link button to link the 2 highlighted classes.
The program automatically picks up all the periods timetabled for each linked activity.
The upper area of the screen shows links that have already been made.
In the example, Phoenix class 3MA.X6 has already been linked with MA(Maths) for class 3X with teacher DWi.
Undo allows you to Undo the highlighted link shown in the upper area. ie. in this example, it would bring back the highlighted class (3MA.X6) into the lower area of the screen, to be linked differently.
Ignore allows you to ignore the highlighted (in green) Phoenix class. Use this if there is no TimeTabler class to link it to.
Duplicate allows you to duplicate any Phoenix class that you choose to highlight in the top area. In the example above it would bring back down, on the left-hand side only, a copy of 3MA.X6, to be linked with another TimeTabler Maths activity. You would need to do this if, for example, this class was taught for some Maths periods by teacher DWi (as shown) and for the other Maths periods by a different teacher.
Here is another example where you would need to use Duplicate.
If a teacher-team changes during the week, for example:
| On Tuesday | On Friday | |||
| Class 8A: | AB (Art) | AB (Art) | ||
| CD (Music) | EF (Drama) |
The Art for AB will be shown as two lines on the right-hand side of the screen, because the teams are different. If you have only one Phoenix class-name for both Art lessons, then you will use Duplicate to duplicate it and so link both lessons.
Instead of using the Duplicate button, you can also use <Ctrl-Click> (ie. hold down the <Ctrl> key while you click with your mouse) to collect 2 or more TimeTabler Classes in the right-hand column, and then click Link to link all of them to the highlighted Phoenix class on the left-hand side.
Format allows you to change the format used for the TimeTabler class name.
In the example it is showing the Scheduling name (3Y etc), but you can click Format to change to the Printing name (eg. Yr-9), if this is easier to recognise.
Save saves your decisions to your hard disc. Use it every few minutes, in case of power-cuts.
Finish saves the data (after taking a few seconds to process it) and ends this session. When you re-start it will be at this point.
The % figure at the top of the screen tells you of your progress.
Continue on this screen until all the Phoenix classes have been linked with a TimeTabler activity (or ignored ).
The program automatically picks up all the periods timetabled for each activity.
Whenever you leave the program, via Finish, TimeTabler will list for you any classes that have not (yet) been linked. You can see the list and get a printout via File ->Export to … ->Phoenix ->View Log.
Finally, when all classes are matched and you click the Finish button, TimeTabler constructs a data file of all this information, including all the timetabled periods and the teacher and room for each class, and stores it in the current TimeTabler directory (which is usually C:TT4win) This file is called TT-PX.CSV (or Tt-px.csv)
If you are running Phoenix on a different machine you will need to copy this file to a floppy disc before the next step.
3. Import the result into Phoenix
a) Run Phoenix and on the main menu choose ‘Timetable‘ on the left-hand side, and then ‘Timetable set-up‘ on the right-hand side.
b) From the list which appears, choose TimeTabler (so the name TimeTabler appears in red below), and then click on the button labelled Import data.
(NB. Make sure you choose Import, not export at this stage.)
c) You are shown a ‘Browse’ screen so that you can steer your way to find the file TT-PX.CSV (or tt-px.csv) that was exported from TimeTabler (it was put in the TimeTabler program directory, or you may have transferred it to a floppy disc). Click on the file name and then click on Open to load it in.
The data is imported into Phoenix.
Look at the timetable in Phoenix to see that it is all there, via Timetable -> Reports
If there are missing lessons (shown still unlinked on the View Log printout in TimeTabler), you can enter them within Phoenix.
When you have finished Exporting, you may wish to:
- use File->Backup to save the TimeTabler data in this Export format, and then
- use File->TT-Restore to re-load the TimeTabler data that you saved in Step 1 of Preparing for Export. This will restore your full staff-names for your timetable printouts during the year.
Please send us feedback on this process, while it’s fresh in your mind, to ask@timetabler.com particularly about
— any suggestions for improvements in these notes,
— any suggestions for improving the software.

 button.