How to Amalgamate Groups/Levels (in Options)
Note: there are 2 ways in which you might 'amalgamate' in Options - this is method B (after creating a pattern)
You can ‘amalgamate’ (or combine) specific groups / choices on your pattern, if you wish to, or if it becomes necessary.
A Examples of when you might wish to do this amalgamating:
- Example 1: a Scottish school might offer Biology at ‘National 4 Level (N4)’ and at ‘National 5 Level (N5)’. Each Biology student chooses one or the other. However, later, due to student group numbers (or staffing problems) you decide that Biology N4 & N5 must be taught as one single group.
To see more details of this scenario, open the HelpScreens in the program and type amalgamate into the Index box of the HelpScreen.
- Example 2: a 6th Form College may wish to merge 2 similar (but uneconomical) courses.
- Example 3: an IB school offers History at ‘Standard Level (SL)’ and at ‘Higher Level (HL)’ but for the Options process wants them to be treated as a single group.
B Steps to follow:
Taking Example 3, let’s suppose that the 2 History groups to be amalgamated are both in Block/Column A.
1) First add a new subject (on the Subjects Screen). Eg. ‘HistSLHL’ .
2) Go into your Current Pattern and add a group of ‘HistSLHL’ into the same Block A (in the usual way on the Design Screen):

3) Highlight any group in Block A, and choose "More -> Amalgamate 2 Groups":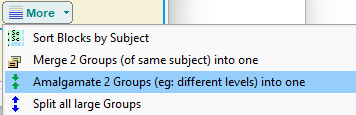
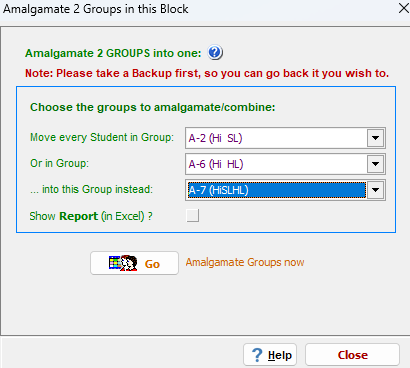
- (a) All students in the HistSL group in Block A, have their choice changed to HistSLHL,
- (b) … and they are all moved into the HistSLHL group.
- (c) Ditto for all students in the HistHL group in Block A.
You can now Delete the empty HistSL & HistHL groups in Block A. To do this, click ‘Re-Design’, change those two groups to ‘-’ (no subject) then Close. When asked if you wish to re-assign your students following your changes, say ‘No’.
C Viewing the original choices:
To see the pupils’ original Choices, go to: "Basic Data -> Original Choices (before amalgamation)".
D Should I run 'Amalgamate' before or after creating my pattern ?
Either is possible, but before has extra benefits: if you do it pre-pattern creation, then you won’t need all the pattern Rules trying to constrain (for example N4 & N5 subjects) into the same block – so AutoCreate will work faster and be simpler, and perhaps find a better solution.
If you wish to use Amalgamate pre-pattern creation then you should follow the steps in the separate article "Amalgamate Method A" - search for 'Amalgamate' or click here.
Any questions; please ask the Support Centre.
By the TimeTabler Team